Configure boards
When you first launch Team View board view or the dashboard widget, you'll see a screen like below which asks you to configure boards.
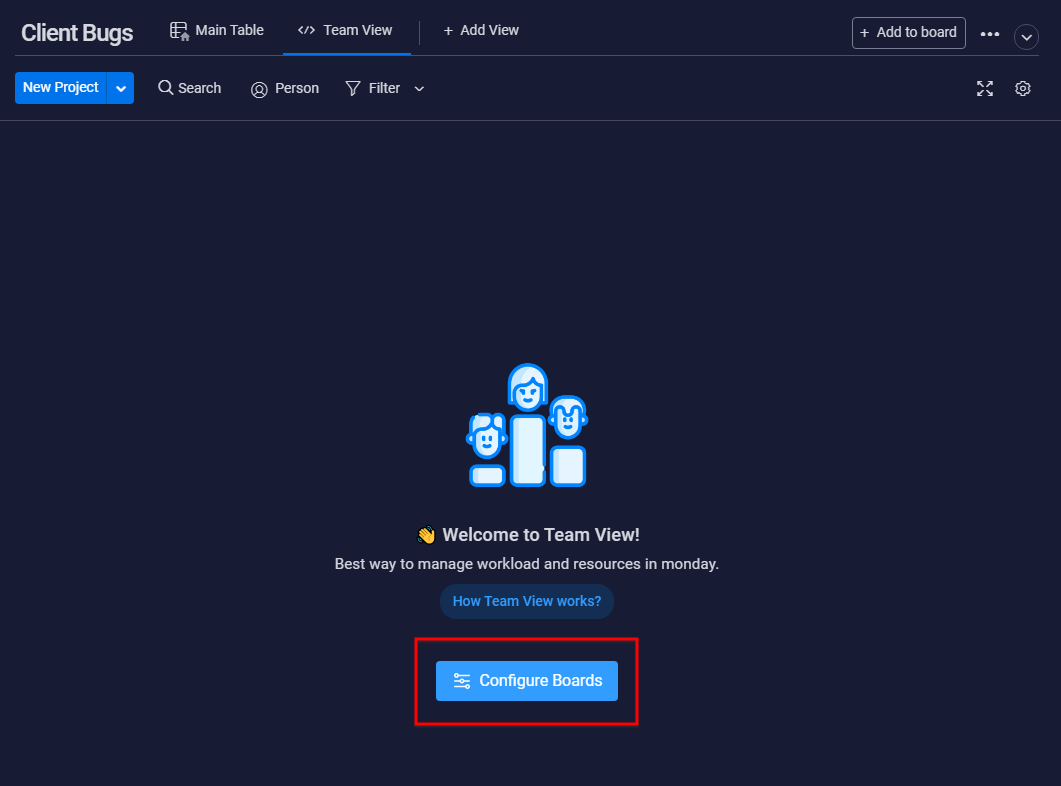
Click on the "Configure boards" button and it will then launch the board configuration dialog as shown below.
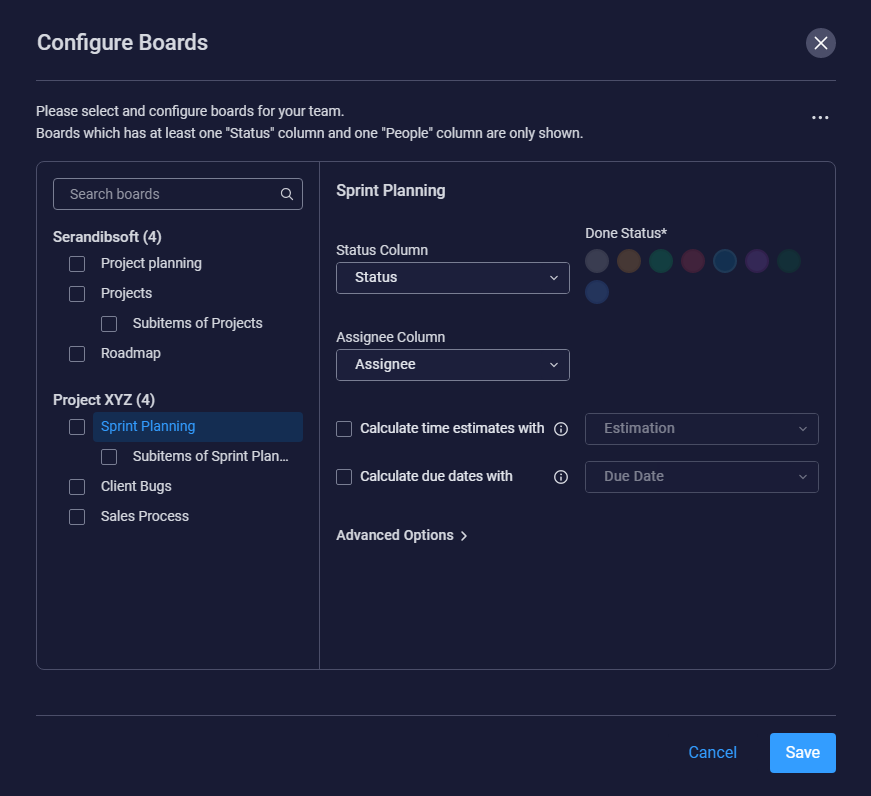
Left Pane
Here you can see a list of boards which has at least one "Status" column and one "People" column categorized under workspace names.
Click on the check boxes to select the boards you need to load data.
Click on the board names to load it's properties in the right pane. You can also search for boards via the top search box.
Right Pane
Here you can configure each boards properties.
- Status Column : If a board contains more than one Status column, you can select a preferred status column from this dropdown. Usually this should be the primary status column of your board. It is then used to categorize items under done and not done states.
- Done Status: (mandatory) : It is required for you to select at least one done status color from here. This done status colors are then used to categorize items under done and not done.
- Assignee Column : If a board contains more than one People column, you can select a preferred People column from this dropdown. Usually this should be the primary People or Assignee column of your board.
- Calculate time estimated with : If your board has a Number column which represents the time estimate, you can select that column from here. You won't see this option if your board does not contain at least one Number column. All numbers are considered in hours. This column is mainly used to calculate time estimate views for your team.
- Calculate due dates with : If your board has a Date or Timeline column which represents the due date of an item, you can select that column from here. You won't see this option if your board does not contain at least one Date or Timeline column. This is later used to filter items based on due dates.
Advanced Options
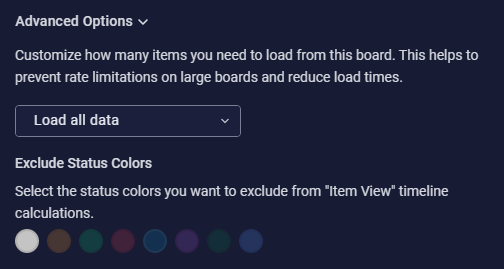
Here you can customize how many items you need to load from each board. This can help to prevent rate limitations on large boards and reduce initial load times.
Each item will open a custom item view which displays a breakdown of the primary status column as shown below.

Here you can define the status colors you want to exclude from this breakdown.
Once you configure all boards, you can click on the "Save" button to save these settings and close the dialog.