Understand people cards
Once you have successfully configured your boards, you'll see something similar to the below image.

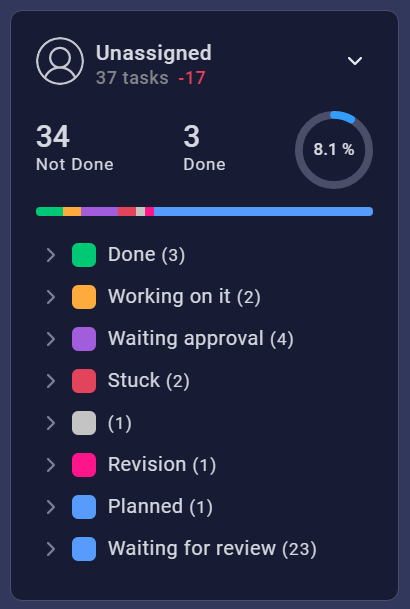
There are three people cards shown in the image above. Each people card represents a member in your team. You can quickly get an insight on how tasks are delegated between different people in your team and status of the completed tasks.
If there are tasks with no assignees, you'll see a separate card called "Unassigned" as shown below.
Let's see what kind of information is available within a people card.
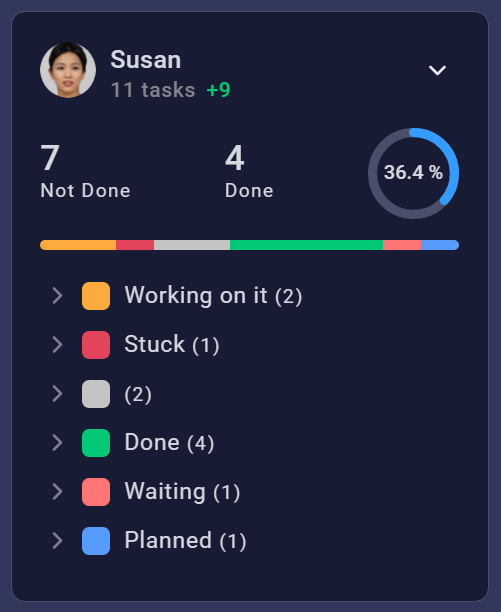
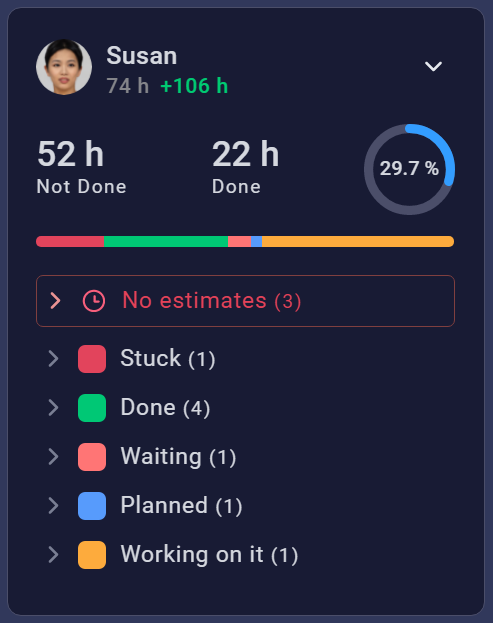
Here on the top left corner, you can see each team member's profile picture and the name. Below the name each team members total task count or the total time estimate is shown. If you assign a workload capacity for your team, you'll see a number which indicates how many tasks or how much of the time estimates should be added or removed from this team member to tally with the recommended workload.
A green number indicates that this user can take on more workload. A red number indicates that this user has more workload than the maximum allowed capacity.
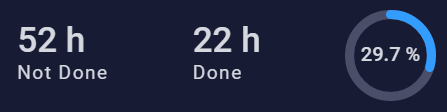
Depending on the view type, you can see the number of "Done" and "Not Done" items as tasks or time estimates. There is also a circular progress bar which indicates the done tasks or time estimates as a percentage.
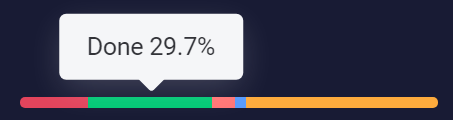
Below that you can see a progress bar which displays the percentages of each status. This is helpful to identify the overall item breakdown of a user.
All the tasks assigned for a user is grouped under their respective status. If multiple items from multiple boards have the same status (e.g. Done) all these items are categorized under a single group as shown below. You can click on any Status group to expand and see more details.
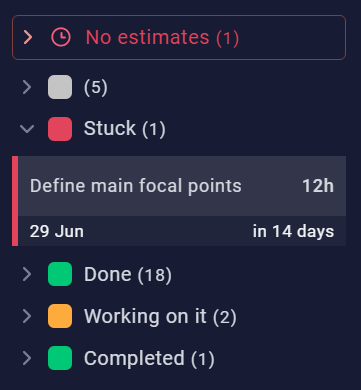
If your view mode is "Time estimates", you'll also see a separate category called "No estimates" which shows all the tasks that have no time estimates.
When it comes to items, there are multiple details you can identify. Depending on the view type, these details could differ. If you are viewing in time estimates mode, you'll see an item like below depending on the board configuration details. You can see board info and the group details of an item by mouse hovering.
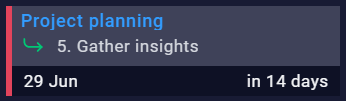
You can customize various properties of an item via the settings section of a widget. Mainly you can see the item name, number of allocated hours and the due date of an item. These details depend on the individual board configurations and the widget preferences. Clicking on an item will open up a custom item view which allows you to view and edit certain info of the item and post updates.